Pages

Wednesday, July 8, 2015

A Colorful Nursery


Since we moved into our home in October 2013, the spare room beside our bedroom has served as a "catch all" room, a "tv room", a spare bedroom, and now a nursery.  Almost as soon as we converted it into a guest bedroom in October 2014, we found out that we were pregnant and were going to need to change it again.  For months, we were asked how we were going to decorate the nursery--what theme and what colors we were going to use.  And for months, we were regularly shown disappointment and anxiety when we said we had no idea how we were decorating and that we weren't worried about it.  It wasn't until May 2015 that we finally began to move furniture out to prepare for the nursery.  I don't feel like I'm very savvy in the decorating department, and neither of us could really see the point of moving everything out of the room when we didn't have anything to put back in it, such as a crib.  One evening my dad called to tell us he was bringing the crib over that they had purchased for us, so we started to clean out the room and prepare for the nursery.

Around this same point, we were receiving more and more questions about how we were going to be decorating, and I began to feel a little anxiety.  I'm generally a pretty easy-going person, but when faced with a particular question over and over that I don't have an answer for, I start to feel pressured to come up with an answer that  I think will be appeasing to those asking.  I settled on a color scheme: coral and navy.  I found some curtains that I liked and began to look for ideas on Pinterest. Although I thought this would be helpful, it only led to more anxiety.  (Remember when I said I'm not a very savvy decorator?)  All of the crib bedding I found that I liked averaged $300, and when looking online, all of the pictures look like they've come out of a magazine meaning it generally costs $$$ to get a similar look.  There's no way I'm spending $300+ on something that is bound to have a 2 am poop explosion all over.  I decided to stop trying to fit into the cookie-cutter Pinterest world of creating a picture perfect nursery and instead, just do whatever felt natural.  For me, that's lots of colors and personal/family touches included throughout.  Here's a peak.


Although we bought a glider, Derek wanted to keep his recliner too.  It'll be perfect for midnight feedings from Daddy. :)

The canvas print was the first item I purchased for the nursery.  The various colors in it served as my inspiration for the rest of the nursery.  Below, the framed button elephant was a handmade gift from a dear friend, and the crocheted bear was a handmade gift from one of my students.  She's inheriting the jewelry box from my (and maybe my mom's?) childhood.
This isn't finished yet.  I'll be hanging something on the wall; I just haven't quite figured out what yet.  The boppy & diaper bag are ready for our trip to the hospital!

He doesn't look like it here, but Baxter loves the nursery.  He and JellyBean spend most of their time in here now.

I love this wall so much because it's so personal to us.  The hanging dresses are from when my sister and I were babies.  The framed elephant drawing was created by one of my students this year, and the "R" was painted by another student.  The embroidered duck is from Derek's childhood, and the wooden car was made by my dad.  (He's incredibly talented at making wooden toys.)  Finally, the Mario and Princess Peach are the cake toppers from our wedding.

It has taken a while to get everything where I want it, and I'm sure we will be making many changes along the way.

Over the weekend, we inherited all of my niece's hand-me-down clothes, which is awesome (thank you Mandy), but was also overwhelming.  I spent two days sorting (thank you for the help, Momma), washing, folding, and organizing clothes, and finally put our dresser to good use.  It took a while to figure out how best to sort items, but I think I'm satisfied with the results.  <<This is where my sister starts to make fun of me :) >>


Starting from the top and moving left to right, we're organized by size & type of clothing.


I've seen many instances where drawer organizers have been purchased for items like this, but I just can't justify spending the money on things like that.  Will our drawers always be this organized? No. Is it a good starting point? I think so!  At least when I ask Derek to grab something specific, he'll have the basic understanding of where to find that item instead of just throwing clothes around the room.


Do you have other suggestions for decorating or sorting baby items?  I'd love to hear them! :)


In case you're wondering where we purchased certain items, you can find the list below with links to the webpages.

Glider: Amazon
White Dresser: Walmart
Shag Rug: Walmart
Changing Pad: Walmart
Changing Pad Covers: Walmart
Crib: Target
Crib Sheet: Target
Curtains: Walmart
Picture Frames: Ikea
Diaper Bag: Amazon (Vera Bradley)

Thursday, July 2, 2015

Summer Berry Cobbler


When I was little, one of my favorite summer tasks was helping my grandparents pick berries.  At the upper end of their huge garden were several fruit and nut trees, and between the vegetables and trees was one long row of berry bushes.  We would walk up and down the sides of the bushes and collect all of the ripe berries for Grandma to use in jams and pies.

Generally a day or two later, I'd walk in Grandma's front door to the sweet aroma of freshly baked pies or cobbler.  I'd walk across the kitchen and peak on top of the counter to see what had just come out of the oven.  It didn't matter what she was making; there would always be two dishes cooling on the counter top.  One was "regular", and the other was Grandpa's, meaning it was sugar-free. 

Even though I was always pretty excited to inspect her latest creations, rarely did I eat them.  I was fairly picky, and refused to eat the berry dishes because I didn't like the seeds in the berries.  I felt that way about everything--blueberries, blackberries, raspberries, even strawberries! It actually wasn't until I was about 20 that I moved past that.  Crazy, right?  These days I regret not taking advantage of tasting all of the delicious concoctions that came out of that kitchen, but at least I can remember how incredible they smelled.

Our neighbors have berry bushes around most of the perimeter of their yard.  I'm not sure if they ever use the berries that grow every summer, but much to my excitement, the bushes have begun to grow across the fence into our yard.  Normally I wouldn't be happy about something growing over, but these are berries! They are my childhood all over again. Because there aren't very many, I have been going out every few days to collect the ripe berries and keeping them until I have enough to make something. 

I finally decided to go ahead and use what I had (along with some store-bought berries) to make a cobbler.  I love the peach cobbler recipe I stumbled upon a few years ago (you can view it here), and I thought I'd just try to modify it a bit for the berries.  It's delicious! You should go ahead and give it a try! :)

Summer Berry Cobbler
Ingredients:
1 Cup Flour
1/2 Cups Sugar
1 teaspoon Baking Powder
1/2 teaspoon salt
6 Tablespoons Cold Butter
1/4 Cup Boiling Water

2 Tablespoons Cornstarch
1/4 Cup Cold Water
1 Cup Sugar
1 Tablespoon Lemon Juice
4 Cups Fresh Berries (I used a mixture of Blackberries, Raspberries, & Blueberries), rinsed and drained

Cinnamon, to taste (optional)


Directions:
1. Preheat oven to 400 degrees F.  Grease a 2-quart baking dish.
2. In a large bowl, mix the flour, 1/2 cup sugar, baking powder, and salt.  Cut in butter until the mixture resembles coarse crumbs.  Stir in 1/4 cup boiling water until the mixture is evenly moist.


3. In a separate bowl, dissolve cornstarch in cold water.  Mix in remaining 1 cup sugar, lemon juice, and berries.


4. Pour the berry mixture into the greased baking dish and in preheated oven for 10 minutes.

5. Remove the berries from the oven, and drop the dough on top of the berries by spoonfuls.  Sprinkle the top of the dough with cinnamon.  Return the baking dish to the oven.

6. Bake 25-30 minutes, until the dough is golden brown.
 Enjoy!
Just look at that bubbly, gooey berry goodness!


Sunday, June 28, 2015

10 Moments from the Past 10 Months

When I posted the Mumford cover of "Fare Thee Well" back in August, I didn't actually think that I would be saying that to my blog for the next several months.  Unfortunately, though, that's what happened.  School began which meant putting my creativity into lesson plans and leaving little room in the bucket to keep up with personal writing.

It's been quite the busy 10 months since I last wrote.  Here's a quick recap of our top 10 moments from the past 10 months:

1. I began my third year of teaching.  This year definitely had its ups and downs, more so than normal I think, but hopefully it was successful.  I never really feel like I've accomplished much at the end of the year; I don't know if other teachers feel this way, but there's always SO much more that I wish I would've done with my students before the year ended.

2. We celebrated my niece's baptism in September and became Godparents! It was a beautiful day and a really nice service.  She was baptized along with our pastors' sweet daughter.


3. Probably the biggest news of the past 10 months was finding out we're expecting!!  I'll post more about this later, but we are super excited to be pregnant with our first child--a little girl--who is due to arrive in just a few short weeks!
I always think posting pictures of pregnancy tests is a little weird... but this is from the actual day we found out after my doctor asked me to take the test.  We were so surprised!

4. We celebrated our 6th annual Friendsgiving dinner.  This is the second time we've been able to host dinner at our new house and decided to hold it in our garage this year.  We strung up lights across the ceiling, lit a fire in the stove, and moved in enough tables and chairs to hold the approximately 30 guests who came.  In the craziness of it all, I managed to forget to take pictures of the food & decor--something that seems to happen about every year.

These are about the only pictures we captured from the evening :)
5. Little Miss Niecey turned ONE! It's so nuts to think that she's already old enough to have had a birthday, but life has definitely been more interesting with her around! :) My sister threw a really nice Winter Wonderland/Frozen themed birthday party for her.


6. I turned 26. What? I'm on the downhill side to 30... and I'm not really sure when that happened. We celebrated with my in-laws' incredible BBQ chicken, cake, and a trip to the park.
Where did this toddler come from? She was just a baby a minute ago!


A 26-week bump
7. We completed a few home DIY projects including re-landscaping in front of our house, painting our shutters, and getting the nursery ready.

8. We spent a lot of time with our families, celebrating both ups and downs of which there have been plenty.


9. We paid off our car a year early! Derek has been really focused on budgeting for the past several months (maybe the past year or more?), and we're slowly seeing the positive results of it.  I just keep telling myself that it'll all be worth it down the road when we can vacation and travel freely without needing to worry about student loans and other debt.

10. We (when I say "we", I actually mean Derek) planted our garden.  We're experimenting with a few new vegetables this year and will hopefully see some good results! :)


Now that it's summertime, I'm hoping to get back on track to blog regularly.  We'll see how that turns out once the little miss arrives in a few weeks. :)

Monday, August 11, 2014

Fare Thee Well

It's no secret that I'm a HUGE Mumford & Sons fan.  I stumbled upon this sweet little cover of "Fare Thee Well" by Marcus Mumford and Oscar Isaac a few days ago.  Take a minute and give it a listen.  Happy Monday!


Sunday, August 10, 2014

Back to School: Syllabus & Classroom Sneak Peak

I've been working hard the past couple of weeks to prepare to school.  Although I don't want summer to end, I can't help but feel a little giddy, especially with all of the back-to-school supplies front and center in many stores.  I know the thought of going back to school and seeing all those bright school-bus-yellow signs advertising pencils for $0.50 makes many people a bit queasy, but I love it.  I have always loved back-to-school shopping.

When I was younger, Mom would take us across the mountain to shop for supplies in Virginia on the tax-free weekend in Staples and Walmart.  Mandy always insisted on buying the $3.00 Five-Star notebooks while I eagerly searched through the $0.10 notebook bin for one of every color.  We would buy all of our supplies, and I would go home and sort it.  I opened little plastic pencil bags and placed everything neatly in my bookbag and waited for the next 3-4 weeks to go by before school would start.  Nearly every other day or so, I could hardly stand the anticipation of a new school year, and I'd go to my bookbag and take everything out.  I loved the smell of it all--new and clean just like the school year I was about to take on.  I would imagine what I was going to learn that year and what I was going to fill the notebooks up with.  I even wished that I already knew the material or had a textbook at home so I could start taking notes and using my school supplies.  After a little while, I'd pack everything neatly back into the bookbag and begin the whole cycle over again.

I'm still that way.  I love back-to-school shopping and getting my classroom ready.  Derek thinks I'm nuts, but even now I can hardly wait to get back into my room and back into the swing of things using my new dry-erase markers.  Don't get me wrong, I love summer and really hate to see it coming to an end.  And although I love my job, there are many days when I do. not. want to even think about creating lesson plans or begin tackling the 2' tall pile of papers that need graded.  And even now, I'm so sad to see my students go because we had a great year and grew close, but I'm very excited to meet this new group of students.

I have my room pretty much finished at this point.  I need to put on some final touches, but everything is in place to meet my students tomorrow evening for orientation.
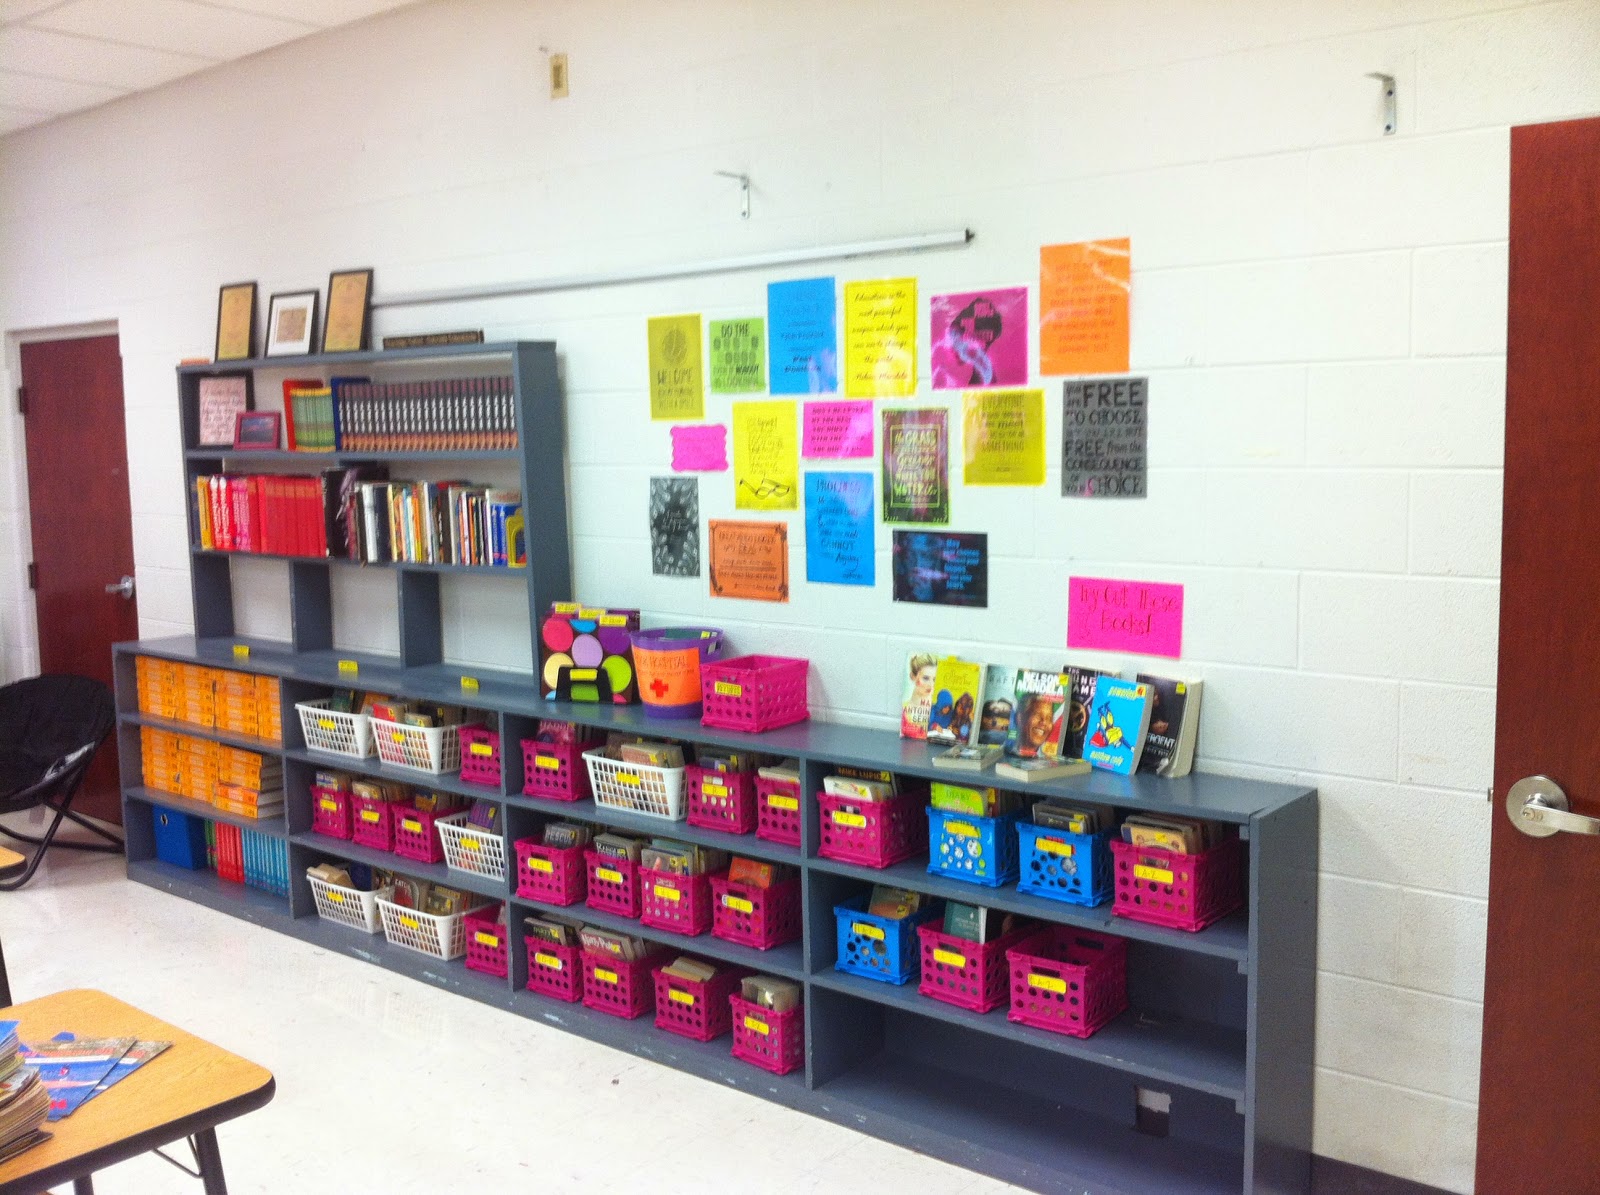
My classroom library this year.  Books are sorted based on Lexile and author's last name, and they're recorded online through the classroom.booksource.com website.  If you're a teacher, check it out!  It's an incredible tool!

I added a motivational quotes wall this year. I plan on having students add to it throughout the year.

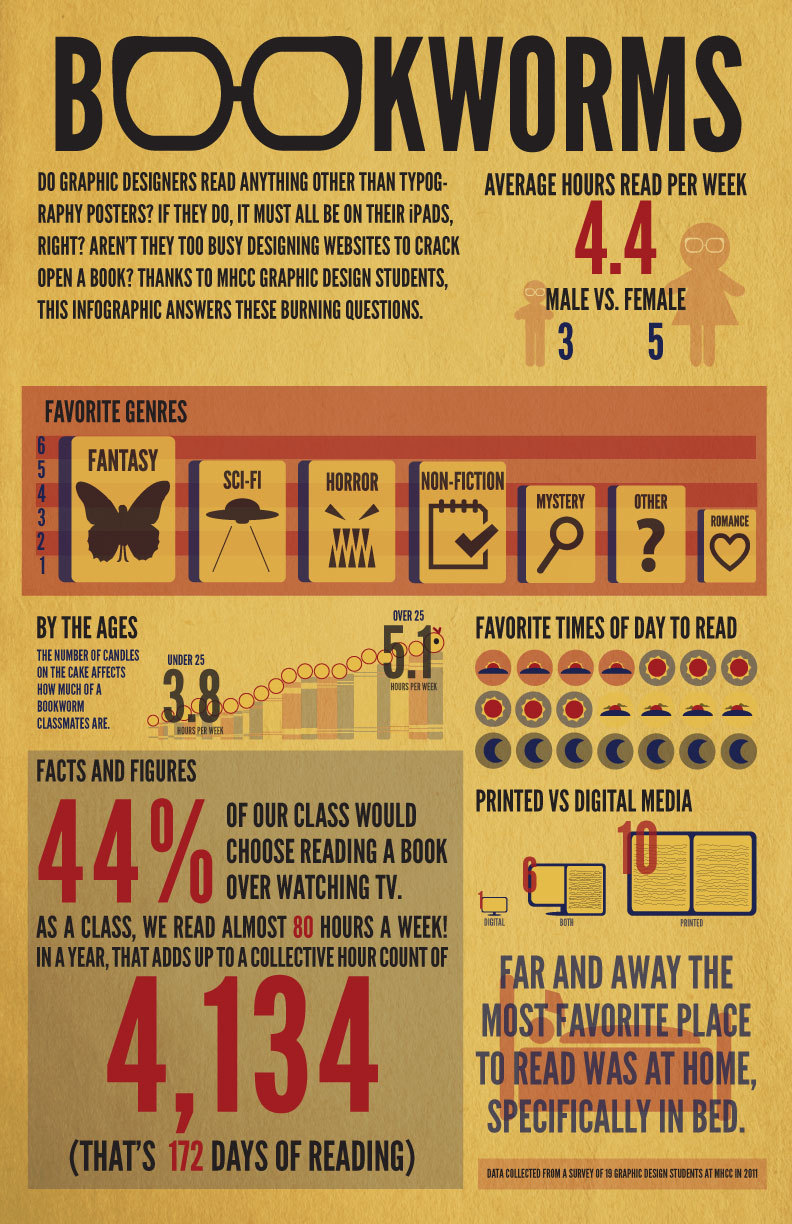
I've also been working on my syllabus for the year.  I took an online class in the Spring where I discovered infographics.  If you are unfamiliar with infographics, they're basically just a poster with information presented in an easy-to-read visual manner.  Here are a few I discovered from a quick Google search:
I have wanted to incorporate infographics into my classroom for a while, but I wasn't sure where to start.  One day, it just hit me.  Why not begin in the beginning of the year with an infographic as a syllabus?

I wasn't really sure where to start, but I figured I needed a template of some type.  I have a little experience with Microsoft Publisher, so I decided to start there.  I worked until I had all of the information included that I wanted and then began formatting.

While I'm not sure that it truly counts as an infographic (because it's three pages instead of one and largely text-based), it's much more visually appealing than what I used the previous two years.  Take a look below.


Do you use infographics in your classroom?  How do you set up your classroom syllabus?  Share your thoughts below.